HR Maintenance
Under this menu are sub-menus that allow you to manage things like company assets, employee contracts, disability tracking, employee documents, employee incidents, company inventory, company vehicles, workers claims, and workflow questionnaires.
Assets Assignments
This area allows you can manage company assets assigned to employees, such as computers, phones, furniture, and more. Once the assets have been added to this page, you can manage the assets by listing expected return dates, registering a returned asset, or mark the item as lost or destroyed.
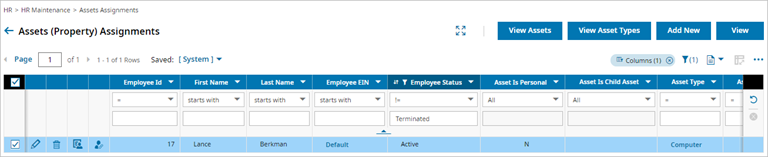
Add New: Use this option to add an asset to an employee. You will choose an employee, select the type of asset, and then list the asset. When selecting Company Asset, this title is a link and when selected will take you to the maintenance page where you can view, edit, and add assets. This maintenance page is located under
After adding the employee and asset, the Asset Assignment page auto-fills with information from the asset definition. On this page, you can set an Expected Return Date, add supporting documents, add notes, mark the asset as returned, mark the asset as lost or destroyed.
View Assets: This option takes you to the Assets (Property) maintenance page. Depending on your security permissions, you may be allowed to perform maintenance on this page such as adding or deleting new assets.
View Asset Types: This option takes you to the Asset Types maintenance page. This is where assets are categorized, such as computer, laptop, phone, etc. Depending on your security permissions, you may be allowed to perform maintenance on this page such as adding or deleting new assets.
View: This option opens the employee entry for viewing or editing. It is the same as selecting the row level edit icon.
Contracts
This area is where you can define and manage employee contracts. This is often used for tracking the contracts of 1099 employees, third-party or part-time employees, or employees who are not a W2 employee in your company. These entries track the contract type, start date, expected end date, actual end date, FTE (full time equivalency), their position (valid only is using Position Management functionality), their schedule and daily hours, their standard work week hours, and their hourly cost.
Once an entry is added, you can use the ellipsis to view/edit the entry, upload a supporting document, or delete the entry.

Disabilities
This area allows you to add and maintain employee disabilities and restrictions. When adding a new entry, you will choose an employee and a disability type.
The title for Disability Type is a link, and for those with permission, will take you to the maintenance page under HR Setup > Disability Types where you can define the types with a Name, Restrictions, and a Description and whether it will be active in the application.
Once the initial pop-up is saved, you can add details to the entry and add supporting documents and notes. Details include:
Started: When the disability started
Ended: When the disability ended (if applicable)
Requested: When the disability status was requested
Actual Benefit Started: If there are benefits involved, such as Workers Compensation or other benefits, enter the start date of that benefit.
Potential Benefit Ended: If the benefit has an end date, or potential end date, enter that date here.
Accommodations: Add any special accommodations the employee requires for their disability.
Accommodations Cost: If accommodations are provided that involve a cost to the company, enter that amount here.
Description: Enter details of the disability.

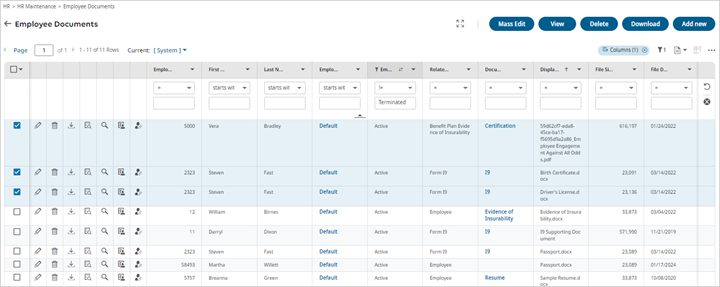
Employee Documents
In this area, you can add and manage employee documents related to their employment. Examples may include EOI documents, resumes, I9s and more. In each row on the report page, you can view, edit, preview, download, view download history, and delete documents. Icons are available to take you to the employee quick links and the employee’s profile.
When selecting Add New, an Upload Document(s) pop-up will display where you will choose up to 5 documents to upload.
After selecting the documents, another pop-up will open where you will select an employee for these documents. For each of the documents uploaded, you can select a document type and enter a description or delete the document.
-
The Document Type label is a link, and when selected will take you to the maintenance page for Document Types, located under Global Setup > Global List Definitions > Document Types. Only users with permission to view or edit this page can access it and either view, edit or add more document types.
-
Once the Upload Document(s) pop-up is complete, select the Upload button to complete the process. If you have selected multiple documents to upload, an entry will be created for the employee for each document. This allows you to individually manage each document with the row-level icons.
In the report page, the Document Type column will display the entries in that column as links. They can be selected and will open that document type under the Global Setup > Global List Definitions page; again, only for users with proper permission. When doing so, you will see the Code, Document Type, Description, and options to control who can download the documents and to whom the documents will be visible.
Visible By: When selecting the field level icon, a Filter page will open where you can build a filter to control who can see this employee’s documents. The filters are based on multiple fields from the employee’s profile, such as their default cost center, their manager, their pay type, their company group, and more. The field will default to All Accounts, which means everyone with access to the employee can view that document. Other filters can be applied to control the visibility of the documents.
Download By: When selecting the field level icon, a Filter page will open where you can build a filter to control who can download this employee’s documents. The filters are based on multiple fields from the employee’s profile, such as their default cost center, their manager, their pay type, their company group, and more. The field will default to All Accounts, which means everyone with access to the employee can download that document. Other filters can be applied to control who can download the documents.
Mass Options for Employee Documents
Mass Edit of Employee Documents
Select multiple documents and then select the Mass Edit button. A pop-up displays where you can edit the Display Name, Document Type, and Description for the selected documents.
Mass Viewing of Employee Documents
Select multiple documents and then select the View button. All selected rows will open where you can view and cycle through your selections using the navigational arrows next to the employee name. If your security permissions allow, you may be able to edit the Document Type and Display Name and then save your edits.
Mass Deleting of Employee Documents
Select multiple documents and then select the Delete button. A confirmation pop-up displays where you can proceed with the deletion or cancel. If you proceed, there is no Undo option.
Mass Download of Employee Documents
A user's Document Type Download By security setting enables or disables the user's ability to download a document via Mass Download.
A timeout is applied when using the Mass Employee Documents Download option. This option becomes active when selecting multiple employees and selecting the Download button. When downloading a file, the job progress bar returns the progress percentage. If the zipping operation takes too long, the operation is stopped and the zipped files are returned with the files that were completed.
Incidents
In this area, you can add and manage employee incidents, such as accidents or safety violations. When selecting the Add New button, a pop-up will display where you will select an employee and incident type. The Incident Type field heading is a link and for users with permission to maintain incident lists, the HR Setup > Incidents > Incident Types maintenance page will open where you can view, edit, and add new types.

After saving the initial pop-up, the next page is where you enter the details of the incident. There are three sections: Incident Info, Resolution, and Comments. Also on this page are options to add supporting documents and notes, and under the ellipsis is the option to download the incident as a PDF. Print Settings are available when selecting Download PDF. This allows you to select which sections and details will be included in the PDF.
Upon selecting 'Add New' to create a new Incident, in the Comments section of an Incident, both the Initiator field and Supervisor field will be auto-populated. The auto-population accounts for managers with limited group access and were not t able to select their own name, or possibly other employees as the Initiator or Supervisor. These auto-populated fields will be able to be edited by selecting another user from the look-up list.
Incident PDFs
Incident PDF Print Settings
Print Settings are available when selecting Download PDF. These settings control the information displayed in the resulting PDF. Within Print Settings are multiple selections that could be part of your incidents. In each section, you can select a slide toggle to enable the settings to show in the PDF. Once the toggle is enabled, specific details of that section can be selected or de-selected for the PDF. The following sections are available:
-
Employee Information: Options include Name, Address, Photo, Employee ID Number, and Phone Number. You can Select All to choose all the options. These options are available for managers and employees who have permission to print their own PDFs.
-
Incident Information: Options include Incident Name, Violation, Report Date, Priority, Reviewer Signed, Incident ID, Incident Date, Status, Employee Signed, and Description. You can Select All to choose all the options.
-
Report Settings: Options include Previous Incidents.
-
Comments: Options include Initiator Comments, Report By Comments, Supervisor Comments, and Witness Comments. You can Select All to choose all the options.
-
Notes: Options include Notes.
-
Resolution: Options include Target Date, Resolution, Resolved Date, and Details. You can Select All to choose all the options.
Incidents Mass Close/Mass Reopen
On the Incidents report a Mass Close button was added to the top of the report. This button allows you to select multiple incidents on the report page and then select Close to close all of them in one action. Also on this page is a Mass Reopen button that allows you to select multiple closed incidents and reopen them in one action. Only closed incidents can be reopened. Any incidents in the selection that have issues will be skipped and a message will be displayed to inform you. Success messages will also display. Below are possible messages you can receive when selecting multiple incidents and selecting one of the mass options.
-
Success: "# incident requests have been successfully reopened."
-
Batch includes unclosed incidents: "# incidents could not be reopened. Only incidents in a closed state can be reopened."
-
Batch includes incidents that were created due to transferring Incident History: "Unable to reopen # of incidents due to transferred incident history."
-
Batch includes an incident to reopen which has some security issues such as the user does not have workflow access, that incident will get skipped with message: "# of incidents could not be reopened due to security issues."
Incidents Mass Edit/Mass Delete
You can mass edit or delete your list of Incidents using the Mass Edit and Mass Delete buttons. They will activate once one or more Incidents are selected on the report page and a confirmation will display.
Incident Info Section
Incident Name: This field will auto-fill with incident type and name of the employee. It is editable if other information should replace the default text.
Incident Id: Enter an optional incident Id name or number.
Violation: Enter the violation type. This field label is a link, and for users with permission to maintain violation types, the HR Setup > Incidents > Violations page will open where you can view, edit, or add new violations. Prior to selecting the linked name, ensure your page is saved first so when you select the back button, it will return to the incident page.
Workers Claim: If the incident involves a worker’s claim, select that claim here. This field label is a link, and for users with permission to the workers claims under the Team menu, the HR > HR Maintenance > Workers Claims page will open where you can view, edit, or add new claims. Prior to selecting the linked name, ensure your page is saved first so when you select the back button, it will return to the incident page.
Incident Date: Enter the date and time of the incident.
Report Date: Enter the date and time the incident was reported.
Status: Enter the status of the incident. Options are Opened, Initiated, In Progress, and Closed. As the incident progresses, this field can be updated.
Priority: Enter an optional priority for the incident. Options are Low, Medium, and High.
Description: Enter a detailed description of the incident.
Incident Signature
Employee Signed: If the employee was required to sign a form or other document related to the incident, enter the date the employee provided the signature.
Reviewer: If there was a reviewer looking at the incident, select that employee here.
Reviewer Signed: If there is a reviewer and this person was required to sign a form or document, enter the date the reviewer provided the signature.
Incident Resolution Section
Target Date: If the incident has target date for completion, enter that date here.
Resolved Date: If the incident has resolved and is complete, enter that date here.
Resolution: These are user-defined fields and allow you to select the incident’s resolution. The field label is a link, and for users with permission, the HR Setup > Incidents > Resolutions page will display where users can view, edit, and add new resolution types.
Details: Enter the details outlining the resolution of the incident.
Incident Comments Section
Multiple comment fields are available where you can select one or more employees and include their comments.
Initiator: The person who initiated the incident can be selected and their comments entered here.
Supervisor: The employee’s supervisor name and comments can be entered here.
Reported By: If the initiator is different from the person reporting the incident, you can enter their name and comments here. Two employees can be selected, and text entry field can be used to either a third person’s name or other information.
Witnesses: If there were witnesses to the incident, their comments can be entered here. Two employees can be selected, and text entry field can be used to either a third person’s name or other information.
Incident Adding Notes in Incidents via Workflow Steps
Managers or employees with access to edit an Incident, or who are part of the incident workflow approval process, can add notes into an Incident throughout various workflow steps tied to the Incident Type, and after the incident is closed. Notes can be added as follows:
-
After the Incident has been closed.
-
Both MSS and ESS users accessing the Incident via the Incident report page, even when there is a workflow in progress.
-
The only two steps of a workflow where adding notes will be excluded are the On Canceled and On Approver Canceled workflow steps.
-
-
Accessing Incidents through the workflow process, including on these following steps: Approve/Reject, Approver Sign, Close, Employee Sign.
-
For Incidents not tied to a workflow, notes can be added at any time, given the user has the proper security permissions. The Employee involved in the incident type workflow process would need security permissions to "My Incidents" under the ESS tab. Managers and Admins involved in the incident type workflow process would need security access to "View/Edit" Incidents under the HR tab.
-
For Incidents created by Transferred Incident History via EIN Transfer HR Action, notes can be added at any point.
Incident Importing Notes
A Notes section is included in the Incidents import template which will allow note details to be included in Incident imports. The import will add new notes for new or existing incidents. It will not update existing notes.
Inventory
The inventory items displayed in this area are created via Inventory Profiles under
Under each inventory profile you can add, view, and manage company inventory assigned to employees. After selecting a profile type, and then selecting the Add New button, you will select an employee and save. After saving, the employee’s inventory items can be added on the next page. Also on this page, supporting documents and notes can be added. If an item is no longer active, you can delete it with the row-level icon. Mass deleting can be done by selecting multiple items and using the Delete button.

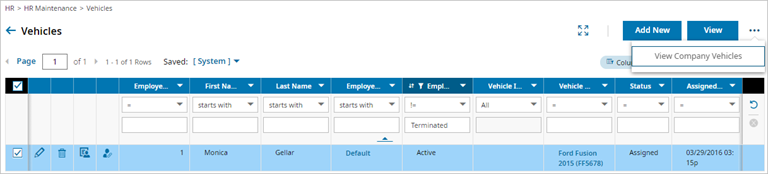
Vehicles
In this area, you can add and manage company cars assigned to employees. Fields are available to list details of the vehicle, insurance, and maintenance history. Once an entry has been created, you can edit it to mark the vehicle as returned or lost or destroyed. Additional documents and notes can be attached.
On the report page, you can view, edit, or delete entries. Quick links and a link to the employee profile are also available.
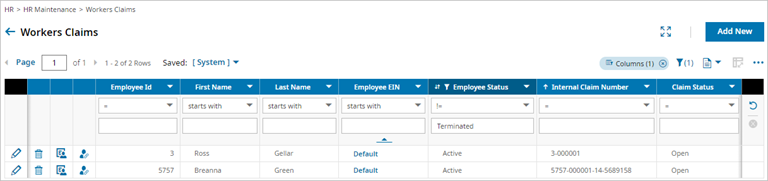
Workers Claims
This area allows you to add and manage employee worker claims. These claims can be company internal as well as safety and OSHA related. Each entry has tabs and jump link sections where details can be entered. Supporting documents and notes can be attached to each claim.
On the report page, you can view, edit, or delete entries. Quick links and a link to the employee profile are also available.
Each entry has the following tab and sections:
Main Tab: Contains Claim Info, Alternate Contact, Claim Entry, Employee Info, and Carrier Info
Injury Tab: Contains Injury Info, Providers (i.e. medical), Facilities (i.e. medical), and Injury History
Incident Tab: Contains Incident Info, Safety/OSHA, Attorneys, and Witnesses
Work Info Tab: Contains Client Information, Occupational Data, Hours and Earnings, and Return to Work
Claim Handling Tab: Contains Claim Handling, Subrogated Parties, and Disputes
Financial Tab: Contains Financial Info, Financial History, Invoices, and Payment History
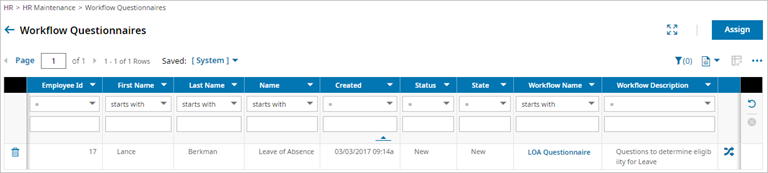
Workflow Questionnaires
On this report page, you can assign workflow questionnaires to employees and then delete them as needed. After selecting the Assign button, you can select a single employee, a questionnaire workflow, and then enter the questionnaire name. In the Workflow Name column, the entry there is a link, and when selected will open the workflow for viewing, and if allowed via your security profile, you can edit the workflow, save, and return to the report page.